はじめに
遂にRaspberry Pi 5 を手に入れたのだ!
Orange PIあるし、悩んだけどね
自分へのご褒美って事で♪
で、手始めに、Raspberry Pi 5 で Passbolt を動かそうという企画w
今回はすんなり動くという結末に(汗
準備
今回購入したものは、Raspberry Pi 5 です、しかも 8GBモデルです。amazonでポチりましたw
まずは、OSイメージをダウンロードする
こちらにあります
https://ubuntu.com/download/raspberry-pi/thank-you?version=24.04.1&architecture=server-arm64+raspi
ubuntu24.04LTSになります
そしてライティングソフト「Raspberry Pi Imager」を ここ(https://www.raspberrypi.com/software/)からダウンロードする
imager_1.8.5.exe を起動してインストールする
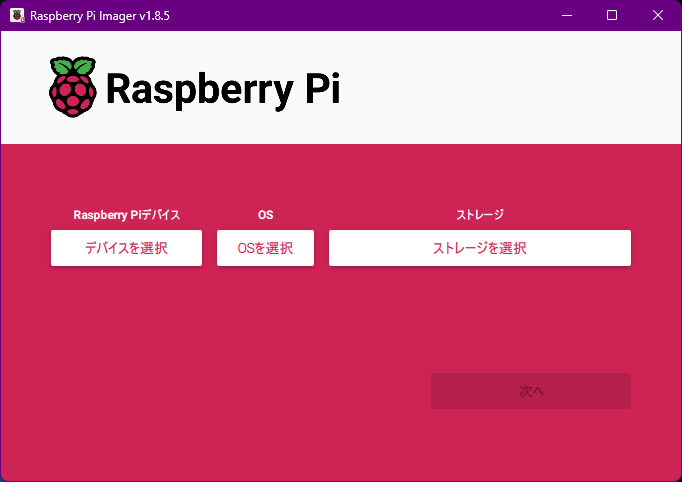
インストール後に Raspberry Pi Imager(rpi-imager.exe)を起動すると
このような画面が表示される

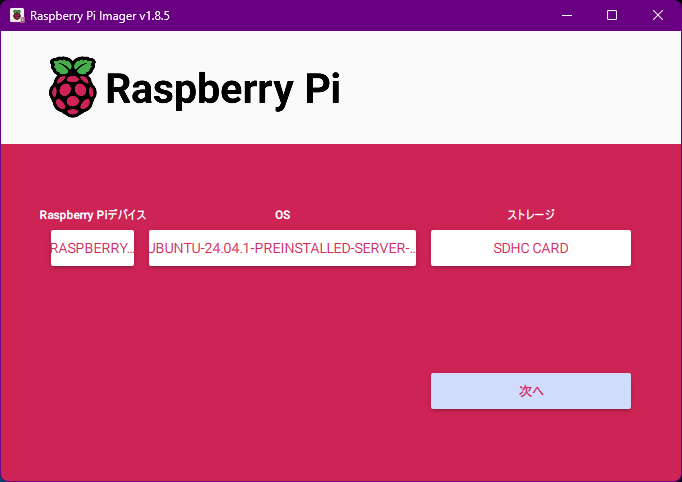
デバイスには、Raspberry Pi 5 を選択して
OSには Use custom を選択し、ファイルは先ほどダウンロードしたファイルを指定します
ubuntu-24.04.1-preinstalled-server-arm64+raspi.img.xz

あとはインストール先のドライブを選択して「次へ」を押下して進める
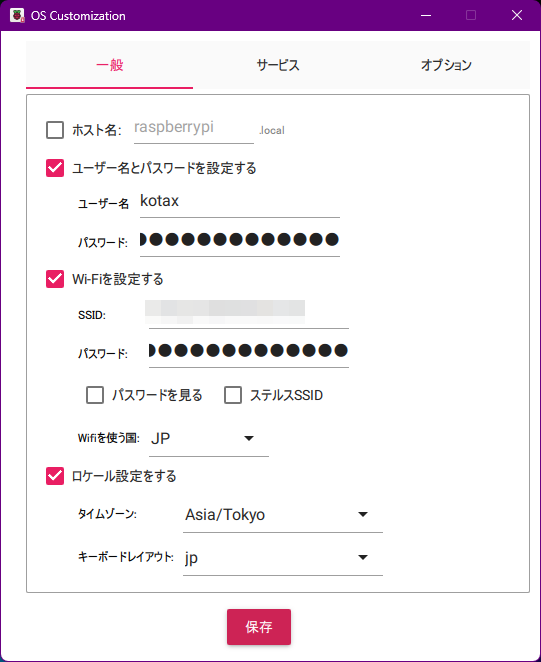
インストール時にアカウントやタイムゾーンなども設定する事が可能みたいなので、必要に応じて設定しておく。これは便利だね!

作成し終わったSDカードを Raspberry Pi 5 本体へ刺して、いよいよ起動!
そういえば電源問題(汗
ノートPCのものが使えたが、専用にAmazonで調達しておいた。
Smraza Raspberry Pi 5用 USB-C (Type C)電源、5.1V 5A PD 27W ラズベリーパイ5用ACアダプター Raspberry Pi 5に適用(ホワイト)
無事に起動できて、ターミナルからも接続完了です
まずは、お約束
sudo apt update && sudo apt upgrade -y
を済ませておきまして
固定IPアドレスに切り替えます
設定ファイルは念のためにバックアップを取っておいて
sudo cp /etc/netplan/50-cloud-init.yaml /etc/netplan/50-cloud-init.yaml.bak
編集します
sudo vi 50-cloud-init.yaml
network:
    version: 2
    wifis:
        renderer: networkd
        wlan0:
            access-points:
                "SSID":
                    password: "****************************************************************"
            dhcp4: no
            addresses:
                - 192.168.0.107/24
            gateway4: 192.168.0.1
            nameservers:
                addresses:
                    - 192.168.0.1
            optional: true
こんな形にした
再起動して反映させちゃいます
sudo reboot
公式にある通り以下のコマンド群を実行していく
curl -LO https://download.passbolt.com/ce/installer/passbolt-repo-setup.ce.sh
curl -LO https://github.com/passbolt/passbolt-dep-scripts/releases/latest/download/passbolt-ce-SHA512SUM.txt
sha512sum -c passbolt-ce-SHA512SUM.txt && sudo bash ./passbolt-repo-setup.ce.sh || echo "Bad checksum. Aborting" && rm -f passbolt-repo-setup.ce.sh
パッケージをセットアップします
sudo apt install -y passbolt-ce-server
パッケージをインストールします
nginx と MariaDBもインストールされているハズなので
sudo mysql_secure_installation
を実行しておく
VALIDATE PASSWORD COMPONENT can be used to test passwords
and improve security. It checks the strength of password
and allows the users to set only those passwords which are
secure enough. Would you like to setup VALIDATE PASSWORD component?

Press y|Y for Yes, any other key for No:
のメッセージが表示されますが、ローカル環境なので、n で良いでしょう
次に
By default, a MySQL installation has an anonymous user,
allowing anyone to log into MySQL without having to have
a user account created for them. This is intended only for
testing, and to make the installation go a bit smoother.
You should remove them before moving into a production
environment.

Remove anonymous users? (Press y|Y for Yes, any other key for No) :
のメッセージが表示されます。
こちらは y を
Normally, root should only be allowed to connect from
'localhost'. This ensures that someone cannot guess at
the root password from the network.

Disallow root login remotely? (Press y|Y for Yes, any other key for No) :
も y で
By default, MySQL comes with a database named 'test' that
anyone can access. This is also intended only for testing,
and should be removed before moving into a production
environment.


Remove test database and access to it? (Press y|Y for Yes, any other key for No) :
も y で
Reloading the privilege tables will ensure that all changes
made so far will take effect immediately.

Reload privilege tables now? (Press y|Y for Yes, any other key for No) :
も y で
次にデータベースとユーザーを作成しておきます
sudo mysql -u root -p
パスワードはそのままリターン
CREATE DATABASE passboltdb;
CREATE USER 'passboltadmin'@'localhost' IDENTIFIED BY 'password';
GRANT ALL PRIVILEGES ON passboltdb.* TO 'passboltadmin'@'localhost';
FLUSH PRIVILEGES;
EXIT;
次に、nginx周りの設定を
以下のようにしてみました
cd /etc/nginx/sites-enabled
rm default
rm nginx-passbolt.conf
シンボリックリンクを貼って
ln -s /etc/nginx/sites-available/nginx-passbolt.conf nginx-passbolt.conf
いったん、以下のように修正
vi nginx-passbolt.conf
------------------------------
	:
  server_name 192.168.0.107;
	:
    fastcgi_pass             unix:/run/php/php8.3-fpm.sock;
------------------------------
そしてnginxを再起動
systemctl restart nginx
passboltの設定
そしてブラウザから http://192.168.0.107 にアクセスして設定を行います
こちらは前回の記事を参考にしてください
前回はいつまで経っても終わらなかったのですが、今回はちゃんと設定も終わり、パスフレーズ入力の画面まで自動的に遷移したのである
おそらく PHPのバージョンの差かなぁ。前回は7.4で 今回は8.3ですから。
パスフレーズを入力するとリカバリーキットがダウンロードされ、セキュリティートークンも設定して完了です!
お疲れさまでした
おわりに
Raspberry Pi 5 は性能が良い分、消費電力も高いし、高い熱も発生する。Passboltにはオーバースペックな感じがするので、おススメは、何世代か前のモデルが良いのでは。
売ってないかもしれませんが…


コメント